Introduction
Another way of creating geometrical representational tessellations is of what I term as grid filling. As with the other three methods, this is once again a matter of drawing straight lines, and is thus inherently simple.
1. The Process
The process is first described and then illustrated abstractly i.e. without reference to motifs, as at this stage their introduction would be a distraction. Note at this stage I am establishing the principle.
(i) Firstly, Figure 1, a random repeating line motif is used, in this instance an 'extended' swastika, placed repetitively in an systematic manner, thus forming a grid (a). From this, at the ends of the longer line, a 'square hole' can be seen.
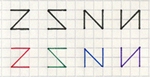
(ii) Consequently, Figure 2, another (random) motif is used to close this space, in this instance a 'Z' line, which thus can entirely fill the 'hole', from which a tessellation is thus formed.
(iii) Following on from this basic premise, the additional motif that closes the space itself be placed in a number of ways, which opens up the possibility of multiple motif tessellations.
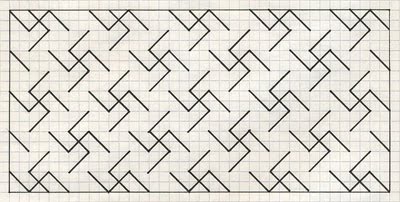
Figure 1: Grid
1.2 Consequently, another (random) motif is used to close this space, in this instance a 'Z' line, which thus can entirely fill the 'hole', from which a tessellation would thus be formed if so completed. However, as the 'Z' line can be placed in four distinct ways, this thus naturally leads to experiments to determine 'all possibilities'. (The second row being colour coded for purposes of illustrating some possibilities as shown by Figure 3 below.) This thus opens up more possibilities concerning the composition.
Figure 2: Z-line
Figure 3: Blocks A-F
For instance, instead of a solitary 'Z' in the same orientation, experiments can be tried out with two, three or four orientations of the Z's. Indeed, the determination of 'all possibilities' leads to a lengthy analysis, of many pages, of which I show here a representative sample.
A few arbitrary examples arising from the grids above:
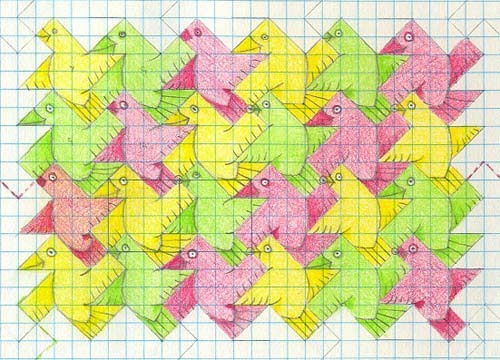
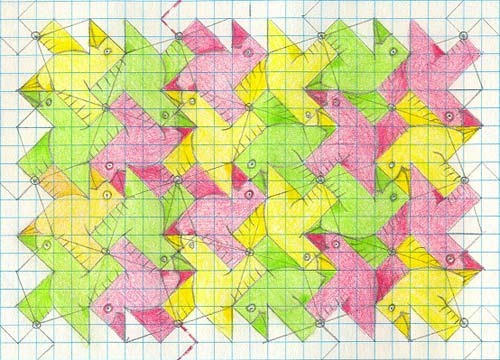
Figure 4a: Two distinct birds, belly and back view
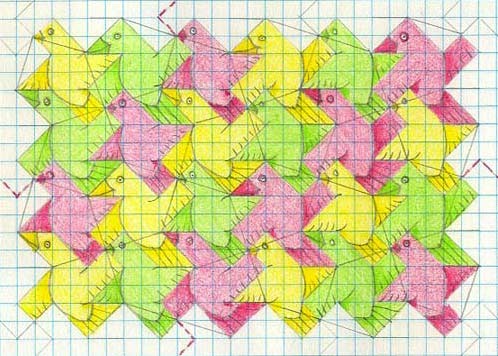
Figure 4b: One bird, belly and back views.
Figure 4b is essentially shown as a finished work in Birds1 No.9, the birds there being of the belly view only.
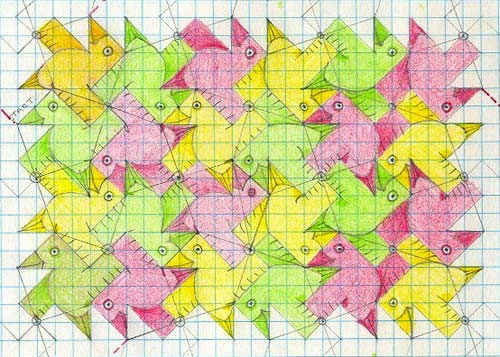
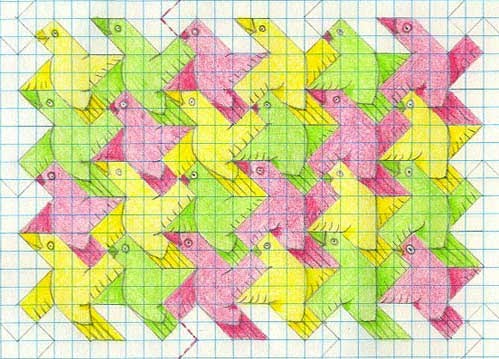
Figure 4c: One distinct bird, belly and back view
This example is essentially shown as a finished work in Birds1 No.3, the birds there being of the belly view only.
Figure 4d: Two distinct birds, belly and back view.
Figure 4e: Three distinct birds, belly and back view.
Figure 4f: Two distinct birds, belly and back view.